
Replacing a heat pump is a significant home improvement, but the installation itself does not have to be stressful. Knowing what to expect can make the process easier and help you prepare your home before the installation team arrives.
During a professional heat pump replacement installation, the process typically includes preparing the work area, removing the existing equipment, installing the new heat pump, making necessary connections, testing the system, and cleaning up when the work is complete.
At Galmiche & Sons, we understand that homeowners want more than a new HVAC system. You want a professional installation that minimizes disruption, protects your home, and leaves you confident that your new heat pump is ready to provide reliable heating and cooling.
If you are planning a heat pump replacement in St. Louis, here’s what you can generally expect on installation day.
Before Heat Pump Replacement Installation Begins
A successful installation starts before the old equipment is removed.
Your HVAC professional should already have evaluated your home and determined the appropriate equipment for the project. This may include considering the home’s size, layout, existing ductwork, electrical requirements, comfort needs, and heating and cooling loads.
Need help choosing the right equipment? Learn more about how to choose a replacement heat pump.
The equipment should also be ready for installation, along with the necessary components and materials.
How to Prepare Your Home
There are several simple things you can do before the installation team arrives:
- Clear access to the existing indoor and outdoor equipment.
- Remove fragile or valuable items from nearby work areas.
- Secure pets in a safe location away from the work area.
- Make sure the technicians can access necessary doors, gates, utility areas, and equipment.
- Ask about anything you need to do with your thermostat before installation begins.
You do not need to dismantle your home or prepare every room. Your installation team can tell you if there are specific areas that need to be accessible.
Step 1: Protecting the Work Area
Once the installation team arrives, preparation typically begins with protecting the areas where technicians will be working.
Heat pump replacement can involve moving equipment, tools, and materials through your home. Professional technicians should take reasonable steps to protect floors, walls, and surrounding areas from unnecessary damage or debris.
This is especially important when replacing equipment in finished basements, utility rooms, attics, garages, or other areas where access may be limited.
One of the common homeowner concerns during an HVAC project is the mess it may create. Proper preparation and cleanup can help keep the disruption to your home under control.
Step 2: Removing the Existing Heat Pump
The next step is removing the old system.
The exact process depends on your existing equipment and how it was installed. Technicians may need to disconnect electrical connections, refrigerant lines, ductwork, condensate components, and other system connections before the old equipment can be removed.
If the system contains refrigerant, it must be handled appropriately by qualified professionals and according to applicable requirements.
The existing equipment is then removed from the home or designated work area.
Why Careful Removal Matters
Removing an old HVAC system is more than simply disconnecting a few components.
Technicians need to work carefully around existing electrical connections, ductwork, refrigerant lines, structural components, and other parts of the home.
A careful removal process helps reduce the risk of unnecessary damage and prepares the area for the new equipment.
Step 3: Installing the New Heat Pump
With the old system removed, the new equipment can be installed.
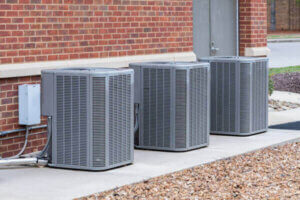
The installation may include positioning the indoor and outdoor components, connecting refrigerant lines, electrical wiring, condensate drainage, ductwork, controls, and other required components.
The exact configuration depends on the type of heat pump being installed.
For example, a ducted heat pump uses your home’s duct system to distribute conditioned air. A ductless heat pump uses indoor air-handling units connected to an outdoor heat pump.
If you are considering a ductless system, our Best Heat Pump Options for Older Homes and Ducted vs. Ductless Heat Pump Systems resources can help you understand some of the factors involved in choosing the right configuration.
Step 4: Connecting and Checking the System
Once the equipment is physically installed, technicians need to make sure the various system components are properly connected.
This can include checking:
- Electrical connections
- Refrigerant connections
- Airflow
- Ductwork connections
- Condensate drainage
- Thermostat or control wiring
- Indoor and outdoor equipment
- Safety controls
Professional installation matters because even high-quality equipment cannot perform as intended if it is improperly installed.
This is one reason homeowners should avoid choosing an HVAC contractor based solely on the lowest installation price.
Learn more about heat pump installation mistakes to avoid.
Step 5: Testing the New Heat Pump
Testing is a critical part of heat pump replacement installation.
After the equipment is installed and connected, the technician should operate the system and verify that it is functioning correctly.
Depending on the system, this may include checking heating and cooling operation, airflow, temperatures, electrical performance, system controls, and other operating conditions.
The goal is to identify potential problems before the installation team leaves.
What About the Thermostat?
Your technician should also make sure your thermostat or system controls are properly configured.
If you have a new or upgraded thermostat, you may receive an explanation of basic operation, settings, scheduling, and other features.
Don’t be afraid to ask questions. A new system can have different controls or operating characteristics than your previous heat pump.
Step 6: Final Walkthrough and Cleanup
Once testing is complete, the installation team should review the completed work with you.
This is your opportunity to ask questions about:
- How to operate the system
- Recommended thermostat settings
- Filter replacement
- Routine maintenance
- System controls
- Warranty information
- What to expect from the new equipment
- Who to contact if you have a problem
The work area should also be cleaned and leftover installation materials and old equipment should be addressed appropriately.
How Long Does Heat Pump Replacement Installation Take?
The time required varies from project to project.
A straightforward replacement may take less time than a project involving ductwork modifications, electrical work, difficult equipment access, or other changes.
The type of equipment and existing HVAC configuration also matter.
For more information about installation timing, see How Long Does Heat Pump Installation Take? Keep in mind that a replacement project can have different requirements than installing a heat pump in a home without existing equipment.
Your HVAC professional should provide a realistic estimate of the expected installation timeline before work begins.
Why Professional Installation Matters
A heat pump is a major investment. Proper installation helps ensure that the equipment can operate as designed.
Professional installation can also help address issues that homeowners may not recognize, including incorrect sizing, inadequate airflow, improper connections, and compatibility concerns.
Our Heat Pump Sizing guide explains why choosing the correct system capacity is an important part of the replacement process.
The quality of the installation can ultimately affect comfort, efficiency, reliability, and the expected performance of your new system.
Frequently Asked Questions
Follow the instructions provided by your HVAC contractor. In many cases, the installation team will handle shutting down and disconnecting the existing equipment as part of the project.
Make sure technicians can easily access the indoor and outdoor equipment. Clear clutter from nearby areas, secure pets, and remove fragile items from the immediate work area. Your contractor can provide additional preparation instructions if needed.
The old equipment is typically removed as part of the replacement project. Ask your contractor how old equipment, refrigerant, and other removed materials will be handled.
It may. New equipment can have different controls, operating characteristics, airflow patterns, and efficiency levels. Your installer should explain the basic operation of the new system and answer your questions during the final walkthrough.
Make Your Heat Pump Replacement a Smooth Experience
Knowing what to expect from a heat pump replacement installation can take much of the uncertainty out of installation day. From protecting your home and removing the existing system to installing, testing, and explaining the new equipment, each step plays an important role in the finished project.
The most important decision, however, happens before installation day: choosing an experienced HVAC professional who will properly evaluate your home, recommend appropriate equipment, and complete the installation carefully.
Galmiche & Sons provides professional heating and cooling services for homeowners throughout St. Louis and the surrounding area. Whether you are replacing an aging heat pump or upgrading your home’s heating and cooling system, we can help you understand your options and prepare for the project.
Ready to replace your heat pump? Contact Galmiche & Sons today to discuss your replacement options and schedule professional heat pump service in the St. Louis area.